React Native...
Most amazing way to create platform independent mobile apps. All you have to have some basic knowledge of JavaScript
and some tricks. So today I want to talk about one of a trick of React Native (RN).
and some tricks. So today I want to talk about one of a trick of React Native (RN).
If you are reading this post that means you already know there are two ways to create RN project -
- react-native init <your_project_name> (You need to have iOS and Android environment setup)
- create-react-native-app <your_project_name> (Generates a QRCode and scan it with Expo after that run the app on your mobile devices. You do not need to have any specific environment setup)
So, after creating RN project you need to change the design of the entry file. You can do this by changing the design of the existing entry file (generally App.js). Or you can create a new file and name it whatever you like then use it as the entry file. The first approach is ok. But the second one is best. Why?? You or your teammate can quickly point out the file while you are facing any errors in the app.
Now let’s talk about how can you change the entry file in RN project. It depends on how you are creating your project.
react-native init <your_project_name>
If you create your project using this command then it is very easy to change the entry file. Open your project in VSCode or any other code editor. Create a new file and give a name of it. Suppose I am creating a js file named “LoginView.js”. Now change the design (Here I have changed the background color and text font size and color) of this file (Image 1). Then go to the top of “index.js” where you can see a line says “ import App from './App';". Now replace this line with “ import Login from './Modules/LoginView'” (Image 2). Now run your app. You can see your app is showing your customize view. (Image 3a & Image 3b)
 |
| Image 1: Changing design of LoginView.js |
 |
| Image 2: Replacing the existing entry file with customized file |
 |
| Image 3a: App is opening from App.js |
 |
| Image 3b: App is starting from customized view (LoginView.js) |
create-react-native-app <your_project_name>
When you are creating the project with this command then changing the entry file is a little bit tricky. You will notice there is no file named "index.js" (Image 4) created while you have used create-react-native-app. So now you have to know the file name (the alternative of "index.js") where you can change the entry file name. You can check it in "package.json". There is a field called "main" (Image 5). You can see a path there. In my case, the path is "./node_modules/react-native-scripts/build/bin/crna-entry.js. Open this js file (Image 6). Here you can see a var called _App and it's value is require('../../../../App') . Just replace this path with your customized view. So I am replacing this line with "require('../../../../Modules/LoginView') ". (here modules is the name of the folder where is the customize folder placed). If you run the app it will look like Image 7b. Image 7a is showing when app is starting from "App.js"
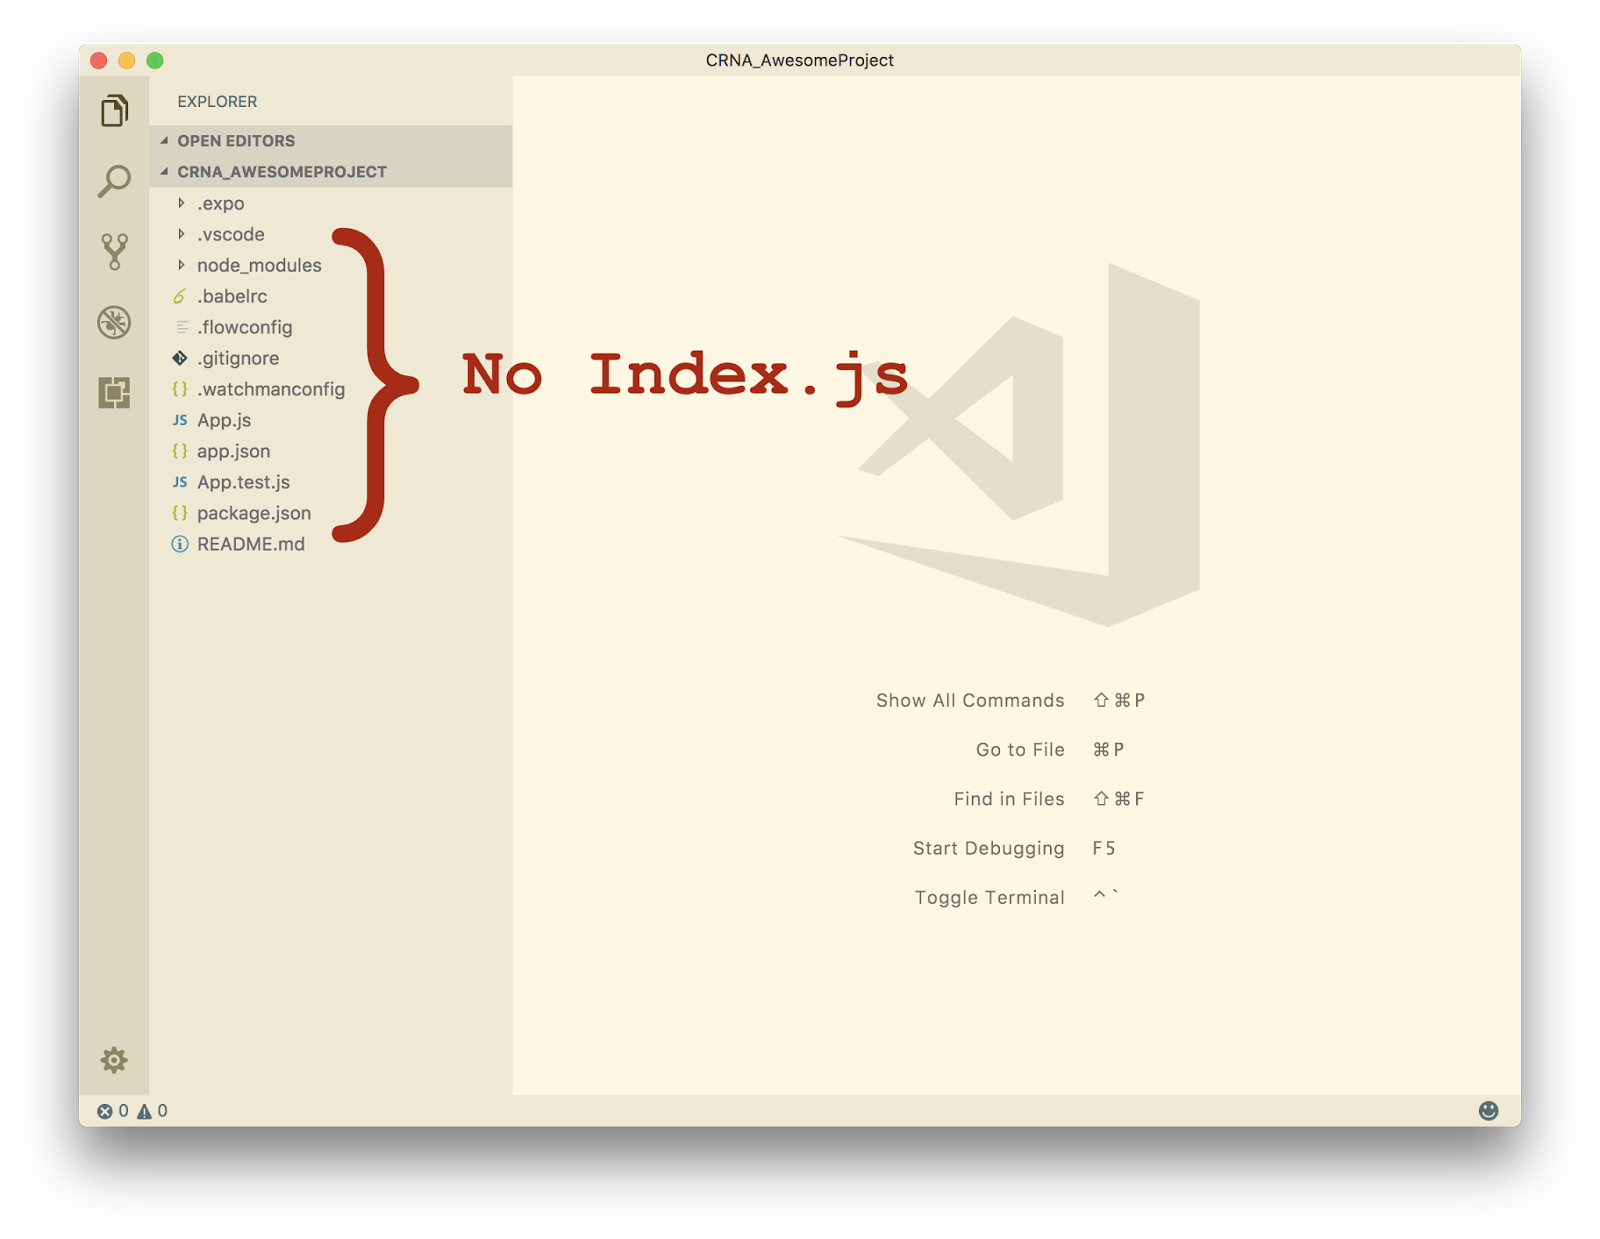 |
| Image 4: index.js did not create |
 |
| Image 5: Checking the package.json to check the entry file |
 |
| Image 6: Changing the existing entry with customized view (LoginView.js) |
 |
| Image 7a: Image 3a: App is opening from App.js |
 |
| Image 7b: App is starting from customized view (LoginView.js) |
I truly appreciate this post. I’ve been looking all over for this! Thank goodness I found it on Bing. You have made my day! Thanks again! Keep update more excellent posts..
ReplyDeleteMobile App Development Company in Dubai
Android App Development Company in Dubai
Mobile App Development Company
Mobile App Development Company in UAE
my pleasure... :)
Delete